I'm a bit of a space geek. I love Carl Sagan, I love finding out about new technology, I even tried to do a module of astrology (such a mistake, I didn't even do science in A level. I had six classes and all I did was draw a penguin).I thought I would celebrate my geekery with a galaxy themed craft but I was at a total loss as to what to do.
Then last week my Mum came home from a bead shop with a collection of wooden beads of various sizes and the first thing I thought was- they're planets! Weirdly enough when I arranged them they were pretty perfect in terms of relative sizes and so I decided to go ahead with my solar system project. I love its primary school chic!
You will need:
Wooden beads of various sizes
Acrylic paints
Paint brushes
Invisible thread
A glue gun
Card
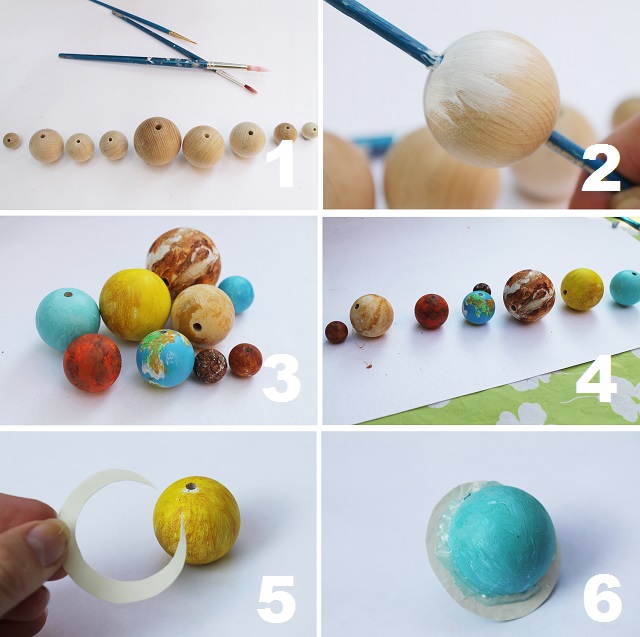
1. Arrange your beads in size order so you know which bead will be which planet. I used this as a size and pattern reference.
2. First apply a white coat of paint to your beads. This will make your colours seem a lot brighter.
3. Paint your beads up!
4. Arrange your beads in order again so you have your order to thread them up.
5. To make a ring for Saturn and Uranus (....lol) cut out a circle with the same internal diameter of your bead and then cut it into a crescent shape. You need a little gap at the back so it can lay comfortably against your skin.
6. Now simply put your crescent over your bead and apply glue to the underside of the ring to hold it in place. Paint your ring grey to look pretty!
To thread my beads I used invisible thread. Once they were in place I then put a blob of glue over the hole so the planets didn't slide around the solar system. We can't have that.


